Step 1 – Change your browser resolution
The first rule when creating a screenshot/video is to change your browser viewport resolution to a minimum size and make it accessible for smaller screens. We found the 1440x900px resolution to be the best compromise to help most of the people see the things you do on screen better (buttons, text, etc.).
To do that easily in the Chrome browser, you can use the following step:
- Install the Window Resizer Chrome extension.
- Once it installs, click on its icon and go to Settings → Presets. Change all presets settings to apply the resolution changes to the Viewport and not the Window. Here’s a helpful video on how to do that.
Definitions:
- Window means the entire Chrome tab that includes the search bar, bookmarks and the webpage you have opened;
- Viewport is the area where the webpage is loaded.
Step 2 – Maintain a clutter free capture area
This means that the application, page or area where you capture the screenshot is as clutter free as possible. Make sure that:
- Browser:
- If you include the browser interface into the recording, hide the bookmarks bar, the extensions and close the other tabs
- Application interface:
- There are no icons, settings, notifications, or popups in that area that are not related to the topic at hand. Here's a bad example.
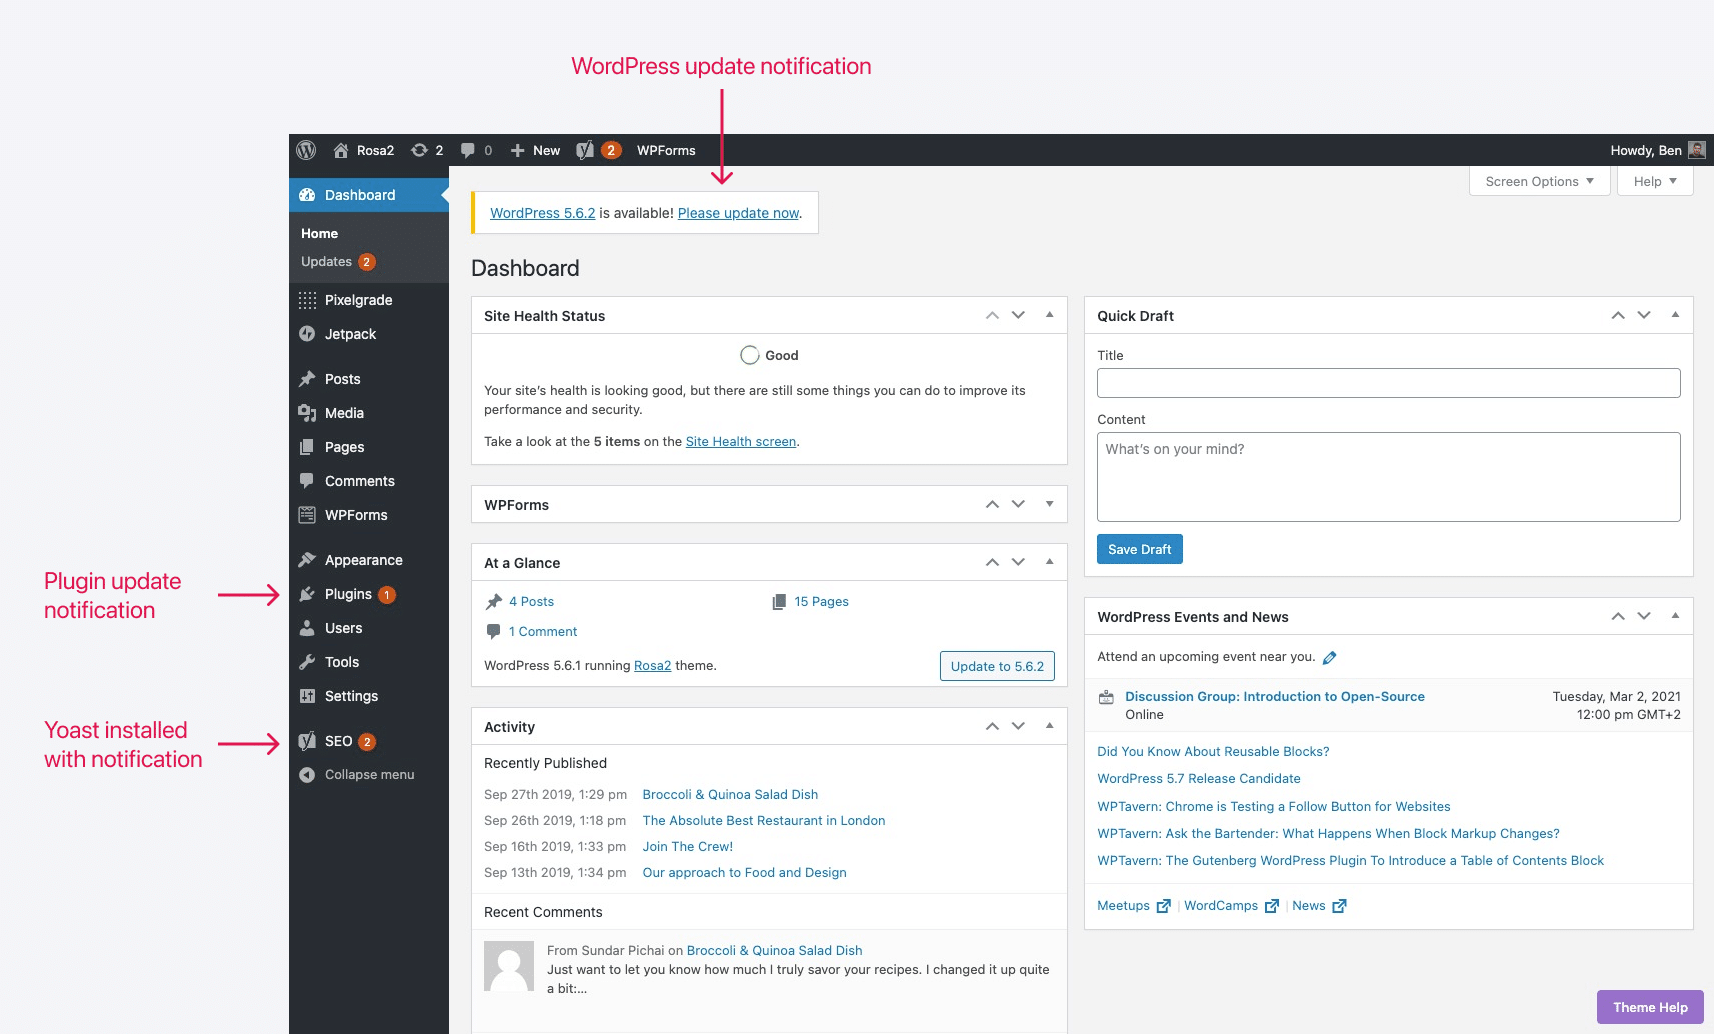
- There are no WordPress, plugins, or theme update notifications on the screen – Here's a bad example from the WordPress Dashboard;
- Only required plugins for that tutorial are activated. There’s no need to have a Dashboard filled with WooCommerce, WPForms, Yoast, Jetpack, and such if the focus is on a different topic.
Step 3 – Edit images/videos
How to edit screenshots:
- Use colors that are in the Pixelgrade brand (RED #DE1651, PURPLE #8E65C0, GREEN #00CAB6);
- If you need to use arrows, make sure they have a similar size and are either horizontal, vertical, or at 45°;
- The text should have the same size and use the SF Pro Display font (download it from here);
- Any geometrical shape (square, rectangle, etc.) used to draw attention to a certain area must have the same outline stroke (border) width as the arrows or other elements;
- Make sure you keep some sort of symmetry between elements.

Tips:
- Use CleanShot for taking screenshots;
- Use Figma and the Documentation Articles file.
How to edit videos:
- Use the same 1440×900 viewport resolution when recording them;
- Remove loading screens to keep the videos short and focused to the point at hand;
- Make sure unnecessary elements are not present on the screen (e.g., hide the Theme Help button using Inspect, hide block settings that are not used in the tutorial). Here is a good example.
Tips:
- Record and edit videos using ScreenFlow;
- Use the built in settings to make the mouse pointer bigger and add on-click animation (here’s an example). Keep in mind that this feature works only if you recorded your screen with Screenflow, not with other recording tool. Here’s a good ScreenFlow tutorial.
Step 4 – Upload and link to visuals
- Screenshots should be uploaded straight to our website. Never link to screenshots that are hosted by other services (e.g., screen capturing services like CloudApp, CleanShot, Lightshot, etc.) because those links expire after a certain time.
- Tutorial videos should be uploaded to our website—don’t host them using screen capturing services. Add videos made by others only if making them ourselves is too complicated and others have covered them in-depth. Also, make sure the sources you are linking are trustworthy (e.g., WPBeginner is a good source).